 Eppiflex EPP Templates


Cart
Your cart is currently empty.
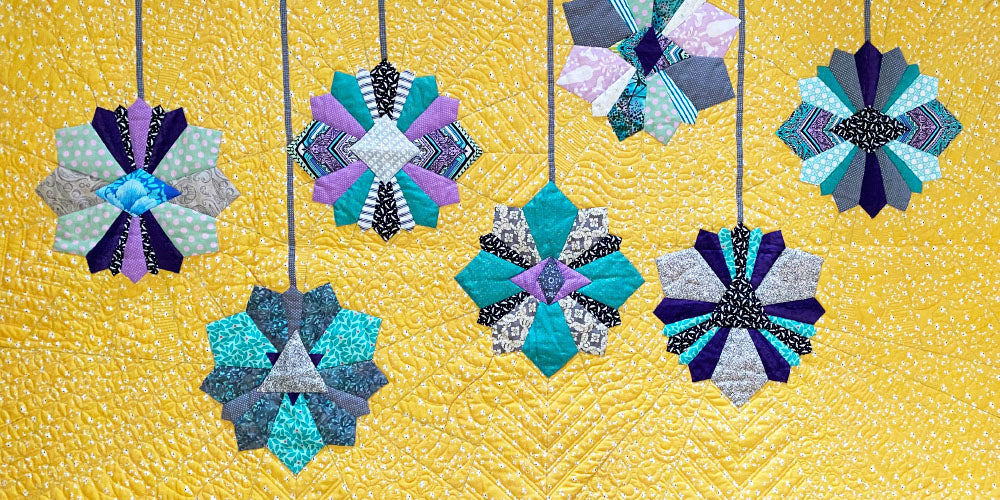
Sewing curves
Sewing Curvy Shapes
I knew as soon as we made the curvy cut out hexagon shape that instruction was going to be needed. Im sure if you have been EPPing for a while you have come across these curves before. For those of you who havent tried curves yet, take heart - it's really quite easy .
First of all, cover your templates with fabric, using your preferred method. I have to say the glue pen is super handy here. Im sure you could baste the straight edges, but not much beats the glue pen for the curvy edges. If you are adamant about NOT using glue, I think the iron will be the next best thing.
Now you have done the prep, its time to sew them together.
You will be sewing more of a flat back stitch rather than a whip stitch on the curved edge so you need to hold the two pieces together while you sew. There are a number of handy tools to help you do this.
I like quilt binding clips, but my brainstrust EPP helpers tell me that a paperclip works, as does a small bulldog clip. Play around and see what works for you.
Whatever you choose it just needs to hold the edges together firmly so that you can sew across the seam. Begin in the centre. ( you can hide your knot under the seam if you like) Pick up just a little fabric off each side - the template forms a nice hard base, making it easy to grab both edges. Continue out to the edge and repeat with the other side, again starting from the middle and working out. Easy right?
I love my blending colour Invisifil thread and the colours Ive used here are perfect for the green, but you'll find that this type of flatback stitch rarely shows on the front as you are grabbing the fabric at the back instead of at the side edge of the template.
I hope this little tutorial has been helpful for you.